WordPress

https-redirects

How to redirect HTTP to HTTPS Using .htaccess

Chrome and Firefox have been showing insecure website warnings on sites that do not have valid SSL certificates. Without valid SSL, the website will show insecurity to the visitors. Therefore, using a valid SSL-encrypted connection for safety is necessary. that is why It becomes very important to redirect your site from HTTP to HTTPS.

Read More:[wprpi]

What is SSL?

SSL (Secure Sockets Layer) is a standard security protocol for establishing encrypted links between a web server and a browser in online communication.

The usage of SSL technology ensures that all data transmitted between the web server and browser remains encrypted.

An SSL certificate is necessary to create an SSL connection. You would need to give all details about the identity of your website and your company as and when you choose to activate SSL on your web server. Following this, two cryptographic keys are created — a Private Key and a Public Key.

How to redirect HTTP to HTTPS

  1. Redirect All Web Traffic
  2. Redirect Only a Specific Domain
  3. Redirect Only a Specific Folder

How to

To force your web traffic to use HTTPS, there are two ways: to edit the codes in the .htaccess file.

Before we move on redirecting HTTP to HTTPS, here’s how you can edit the .htaccess file. you can skip to the Redirection steps if already know about it.

https valid ssl
Character illustration of people holding world wide web icons

Editing .htaccess File

There are instructions in the .htaccess file that tell the server how to act in certain scenarios which directly affects how your website will functions. Common directives in .htaccess file:

  • Redirects
  • Rewriting URLs

Ways to edit a .htaccess file:

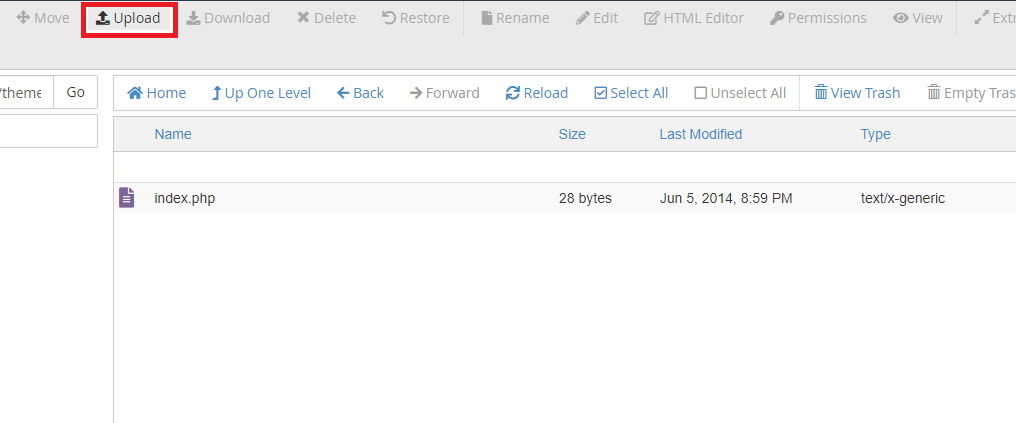
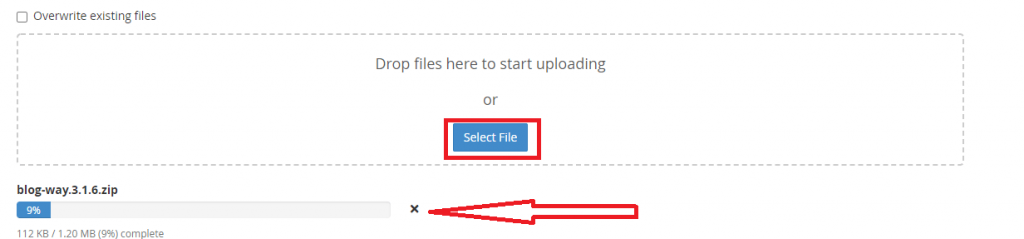
  1. Edit the file on your computer and upload it to the server using FTP.
  2. Use “Edit” mode in FTP program that allows you to edit a file remotely.
  3. Use a text editor and SSH to edit the file.
  4. Use the File Manager in cPanel to edit the file.

Bonus:

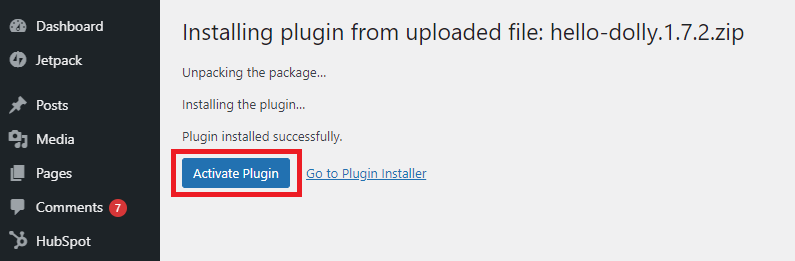
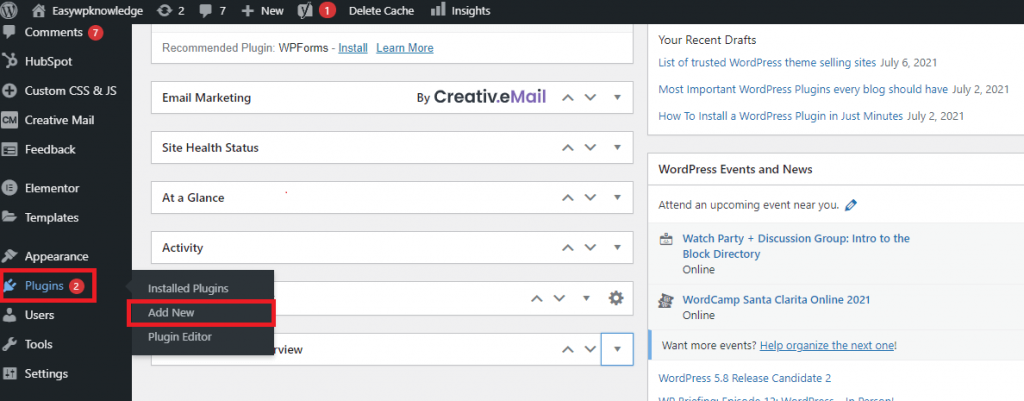
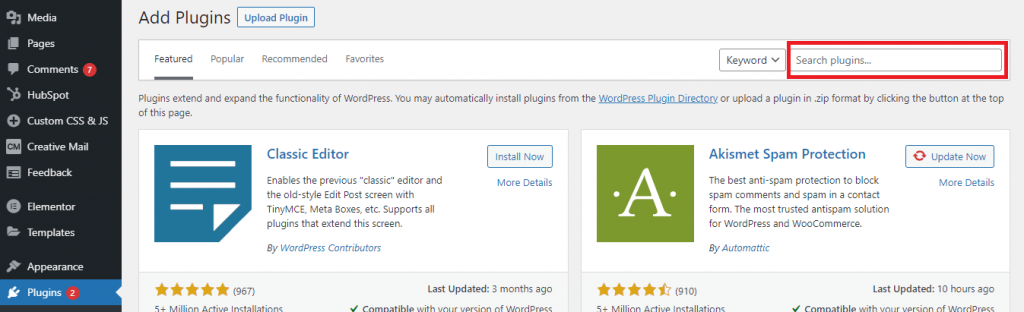
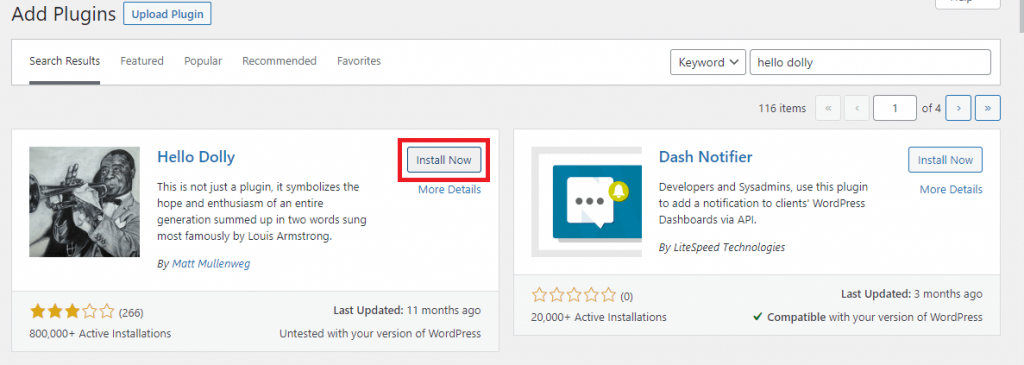
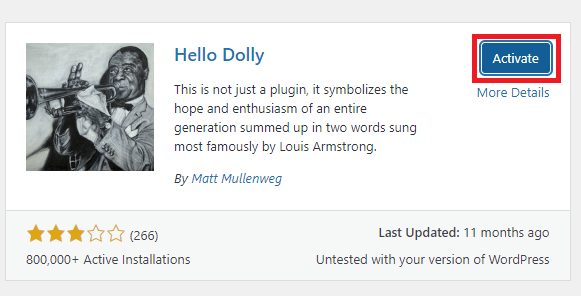
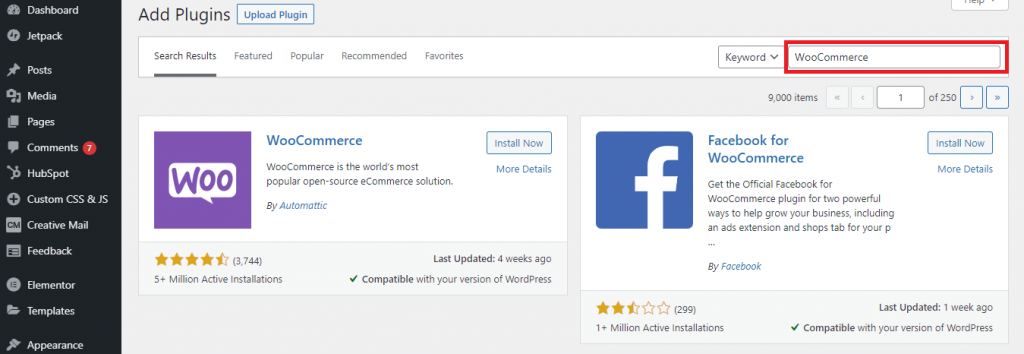
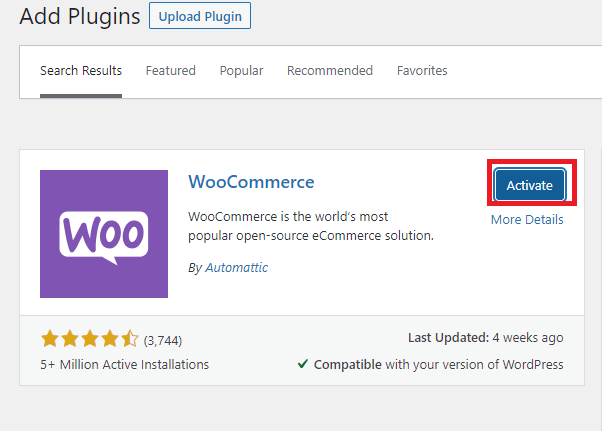
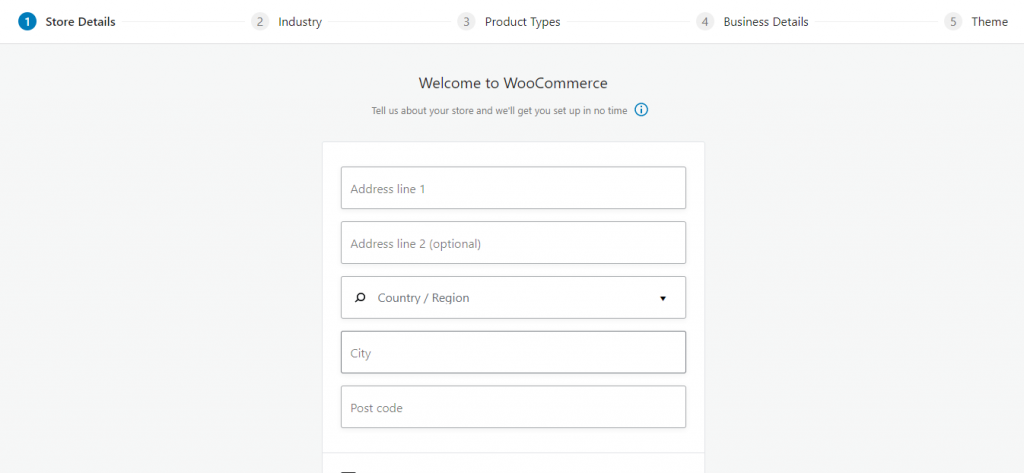
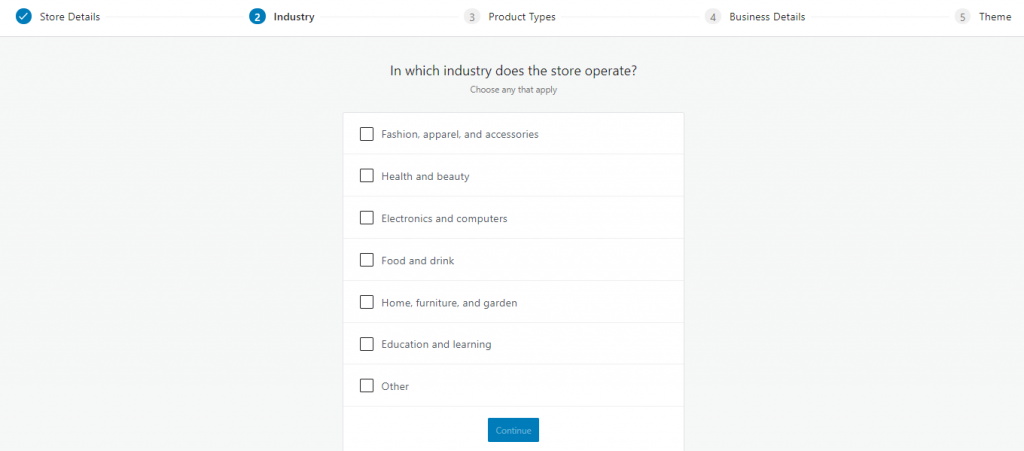
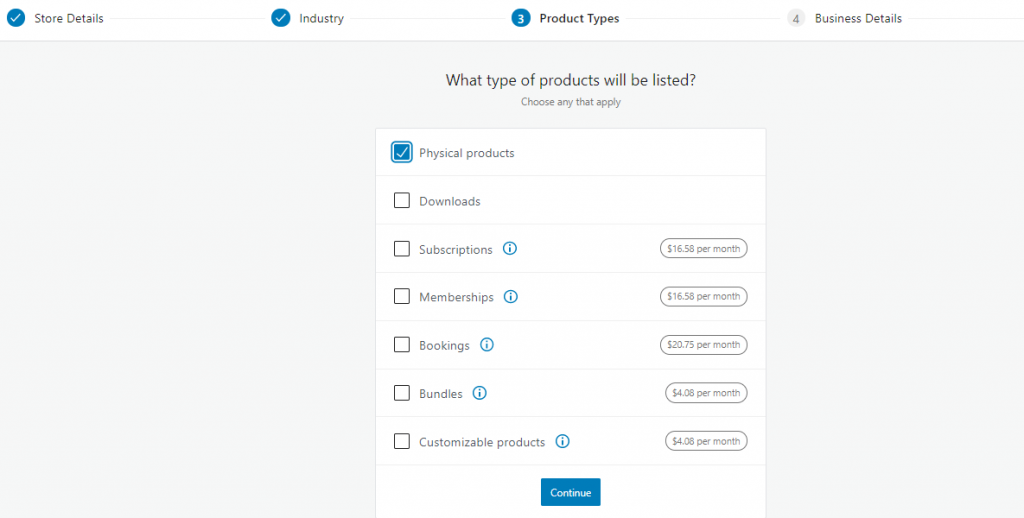
Do you know in WordPress you can do this using a plugin, Here is a guide for you on how to install a WordPress plugin?

Editing .htaccess in cPanel File Manager

Note You should take a complete back of your site before any changes.
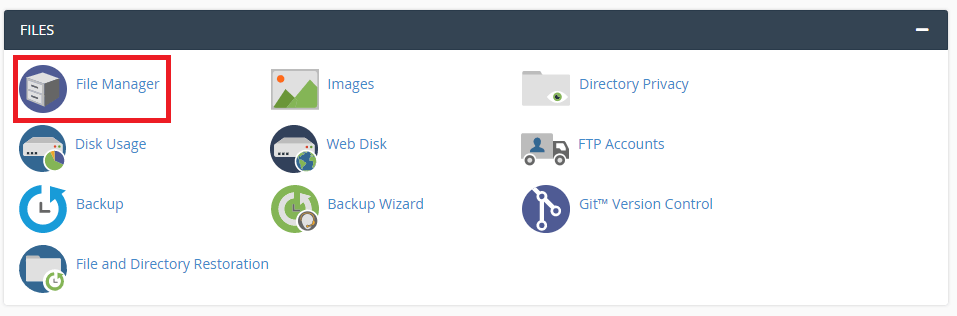
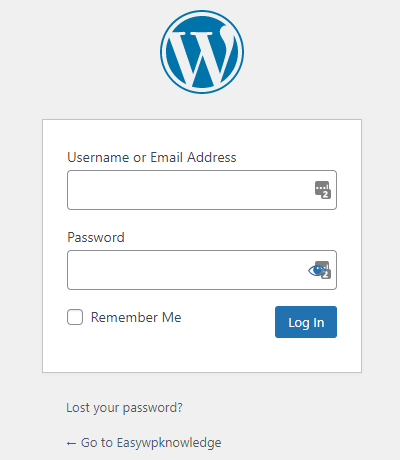
  1. Login to cPanel
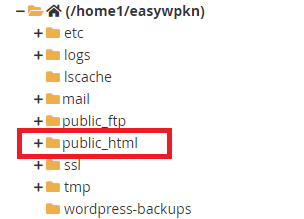
  2. Files > File Manager > Document Root for:
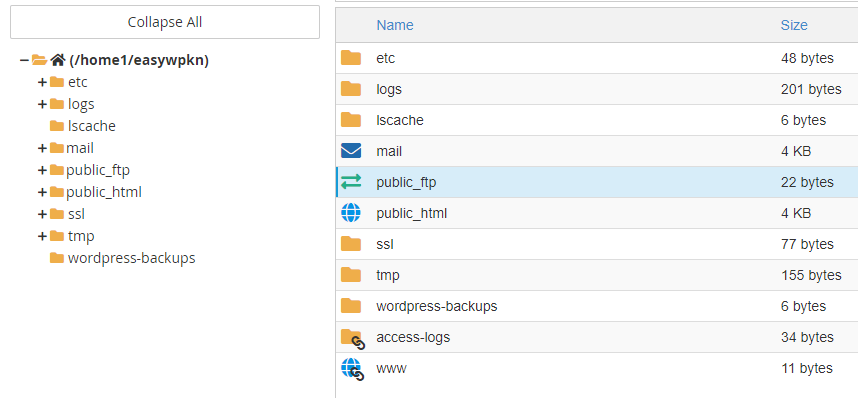
  3. Now select the domain name you want to access
  4. Check “Show Hidden Files (dotfiles)”
  5. Click “Go”
  6. After a new tab or window opens, look for the .htaccess file.
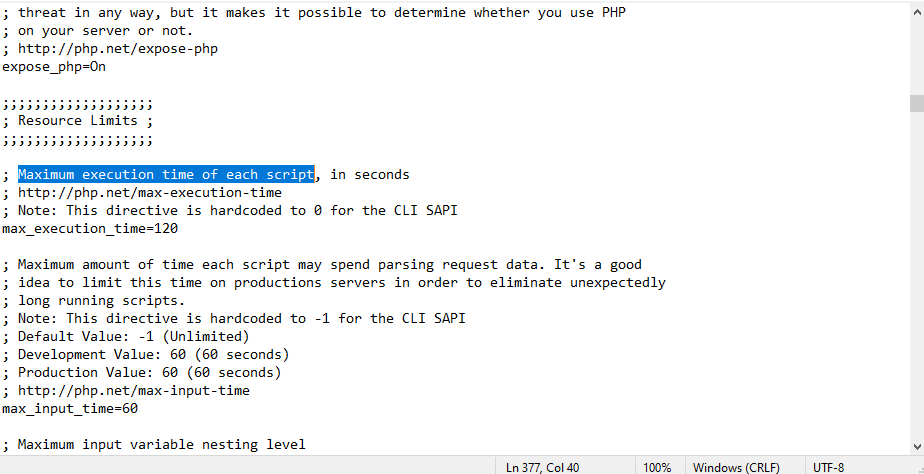
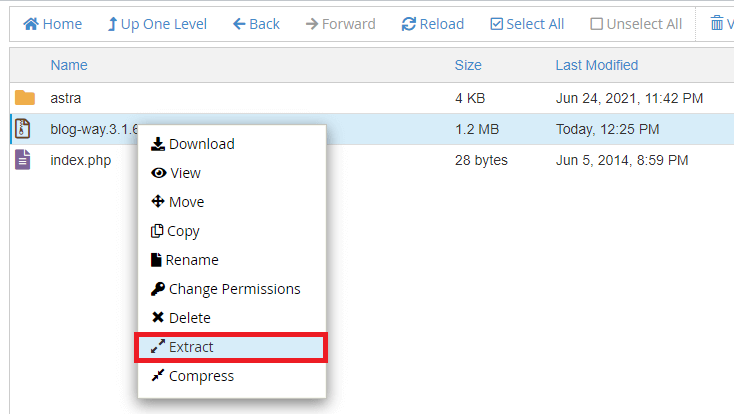
  7. Right click on the .htaccess file and click on “Code Edit” on the menu.
  8. A dialogue box may pop up asking about encoding. Click “Edit” button to continue.
  9. Edit the file
  10. “Save Changes” when done.
  11. Test your website to make sure it is done correctly. In case, there is an error, restore to the previous version and try again.
  12. Once you are done, click “Close” to close the window.

1. Redirect All Web Traffic

If you have existing code in your .htaccess, then add the following code at the top

RewriteEngine On
RewriteCond %{SERVER_PORT} 80
RewriteRule ^(.*)$ https://www.yourdomain.com/$1 [R,L]

2. Redirect Only a Specific Domain

For redirecting a specific domain to use HTTPS, add the following:

RewriteEngine On
RewriteCond %{HTTP_HOST} ^yourdomain\.com [NC]
RewriteCond %{SERVER_PORT} 80
RewriteRule ^(.*)$ https://www.yourdomain.com/$1 [R,L]

The code for our website looks like this

RewriteEngine On
RewriteCond %{HTTP_HOST} ^easywpknowledge\.com [NC]
RewriteCond %{SERVER_PORT} 80
RewriteRule ^(.*)$ https://www.easywpknowledge.com/$1 [R,L]

3. Redirect Only a Specific Folder

Redirecting to HTTPS on a specific folder, add the following:

RewriteEngine On
RewriteCond %{SERVER_PORT} 80
RewriteCond %{REQUEST_URI} folder
RewriteRule ^(.*)$ https://www.yourdomain.com/folder/$1 [R,L]

Replace “yourdomain” with your actual domain name(eg: easywpknowledge.com), wherever required. Also, in the case of the folder, replace it with the actual folder name.

ssl activated
how to fix maximum execution time excceded

Fatal Error: Maximum Execution Time Exceeded in WordPress

Are you facing a ‘fatal error: Maximum execution time of 120 seconds exceeded’ on your WordPress website when trying to update a WordPress plugin or theme?

Normally, this problem happens when a PHP code in your WordPress website/blog takes a long time to run. reaches the time limit set by your hosting provider. To prevent the abuse of server resources time limit is very important.

This article will show you how to fix the fatal error: maximum execution time exceeded in WordPress.

Why ‘Maximum Execution Time Exceeded’ Error Occurs?

WordPress core is coded in the PHP programming language. To protect web servers from being abuse, there is a time restriction set for a script to how long time it will run.

The actual time restriction different for different hosting companies. However, usually, the time for the maximum execution is set between 30 – 120 seconds because that’s enough for a good script to run.

When a script reaches the maximum execution time limit, an error is thrown by the servers that the maximum execution time is exceeded.

There are two methods to solve this error.

Let’s start Fixing Execution Time Exceeded Error

Although Maximum Execution Time Exceeded error is shown as a ‘fatal error,’. It is the most common WordPress error that many developers face. But you can easily resolve this by changing the time limit.

Caution: We strongly recommend not to change this setting permanently. change it for a script, when it runs successfully revert back it to your hosting server’s original limit.

If this error is caused by a plugin, simply go to your installed plugins menu. There you can simply deactivate or delete the plugin that is causing the error.

However, if the plugin is important and you don’t want to deactivate It, then you can fix this cause that triggered the error.

You will need to manually edit your .htaccess file to fix this issue by adding a line of code in the .htaccess file.

Simply go to your website cPanel and look for the file manager there.

how to install a wordpress theme using cpanel

Your .htaccess file is located in the main directory of your site. Simply go to file manager and look for the “Public_html” directory. Navigate to it and you will find a file with the name .htaccess.

file manager home

Right-click on the .htaccess file and choose edit. the file will be opened in a text editor. Simply add the following line of code to the end of the file.

php_value max_execution_time 300

This will increase the execution time to 6 minutes. Now refresh site and see if the error is resolved or not. If still this error happens. try to increase it more and more.

Second Method

The second method is to change your php.ini file.

The php.ini file is the configuration file that defines settings for your PHP on the server. Many hosting platforms, you may not be able to find it inside your website directory.

If you can not file that file simply create a new one. Go to the root directory of your website. Here create a new file with the name of php.ini and add the following line of code and save it.

max_execution_time = 60

If you are running on localhost and using XAMPP, then you can navigate to your xampp installation directory, usually in your C:/Xammp folder. Now locate the PHP folder and find the php.ini file. Right-click on it and select edit.

php.ini will be opened in the default text editor. Search for the ‘Maximum Execution Time’ and change the Execution time there, as shown in the below image.

php ini file execution time

Now save this file and check the site, hopefully, the error will be resolved. If not then simply comment below so we can help you.

activate plugin screen

How To Install a WordPress Plugin step by step guide

Install a WordPress Plugin is the first step after installing a theme. This is an ultimate picture guide tutorial for WordPress beginners, to get started. But before starting here is a question, what are WordPress plugins, and why we need them?

In simple words, the answer is that plugins are a piece of code that enhances the performance of WordPress or other plugins. They can add features just like advanced forms, slideshows, analytics, etc.

there are numerous free and paid WordPress plugins are available on the Internet. But the installation steps are the same for all. Here in this tutorial, we will show you how to install a WordPress Plugin.

IMPORTANT NOTE!

if you are using WordPress.com then you can’t install a plugin. Plugin installation is only available for WordPress.org

There are two ways to install a Plugin

Before going further: Check out our developers handpicked best WordPress Plugins

1. Install a Plugin using Built in WordPress Plugin Search

The easy process of installing a WordPress plugin is to use the WordPress Builtin plugin search facility. The only drawback of this option is that it will search the free WordPress plugin repository only, paid plugins cannot be installed through this option.

Step 1:

Login to your WordPress dashboard and, in the left side menu you will find the plugins option. Hover over this and a sub-menu will open. Here you will see three options

  • Installed Plugins
  • Add New
  • Plugin Editor

Click on the add new button and it will take you to the plugin search window.

Step 2:

You will see a plugin search window just like the below screenshot. start typing the name of the plugin in the search box and WordPress will show you the results. If you are looking for certain functionalities you can filter your search by clicking on the Popular or Recommended tab.

Step 3:

After you find your desired plugin you will see a “Install Now” button. Here for this tutorial, we are installing the famous Holly Dolly plugin. Click on the install now button and it will start Installing the selected plugin.

Step 4:

After installation has finished, the Install Now Button will be transform to “Activate”. Click on Activate button to activate the plugin as seen in screenshot. Plugin will be activated and added to the installed plugins.

Important: There are many site where paid plugins are available for free in a nulled or pirated form. We strongly recomend not to use them at all.

2. Install a Plugin By uploading ZIP file

Step 1:

Download the zip of the plugin that you want to install. You can find zip file on paid plugin websites or directly buy from plugin publishers.

After you have your zip file ready go to your dashboard and in Plugins menu click “Add New“. This time inseated of searching you will see a “Upload Plugin” button at top left corner of the page. Click that buutton.

After clicking the upload plugin button a new selection menu will open in a dropdown mode.

Step 2:

Click on the choose file button and navigate to the zip file in your computer that you downloaded.

Step 3:

After the file has been selected ‘Install Now’ button will be activated. Click on install now button and wordpress will start upload and installing your plugin.

Step 4:

You will see the step by step process of wordpress unpacking the package and installing your plugin. after all steps finish you will see a message ‘Plugin installed successfully’ and a blue color button of Activate Plugin. Click on Activate Plugin button and your plugin will be activated.

3. Bonus

Long story short, you can choose any of the above methods or just drop us a message at [email protected] and our expert WordPress will upload your new plugin for Free.

how to install a wordpress theme step by step pictorial guide

How To Install a WordPress Theme Step-by-Step guide

Are you looking for help to install a new WordPress theme, then you are in the right place. In this pictures guided tutorial for the latest version of WordPress we will show you how to install a WordPress theme. You have two options, follow this step-by-step guide or contact us for free theme installation by expert WordPress developers.

Before going further: Check out our developers handpicked best WordPress Themes

Steps:

  1. Login to WordPress Admin Dashboard
  2. Go to Appearance Menu
  3. Click on Install New
  4. Search for Theme
  5. Upload new Theme
  6. Alternatively, Upload using cPanel
  7. Bonus

1. Login to WordPress Admin Dashboard

The first step is to log in to your Website Admin dashboard by typing your domain name and wp-login as shown below.

www.yourdomainname.com/wp-admin

Replace “yourdomainname” with your domain and hit enter.

for example, we for our site type the following address to go to the admin dashboard.

www.easywpknowledge.com/wp-admin

wordpress admin login screen

2. Go to Appearance Menu

After Logging in find Appearance in the left sidebar, hover over it, and Click Themes in the sub-menu.

3. Install new theme

If you’re looking for a free theme then the best way is to install it from the WordPress theme directory provided by WordPress.org, you can search for any theme by using the built-in theme search functionality from your admin dashboard.

To go to the theme search page click on the “Add New” button.

4. New Theme Search

Here you see the theme search window. Here you search the 80000+ free WordPress themes of all categories. Start typing and it shows you your desired theme. You can also use the featured, popular, latest, or favorite tab to customize your search for better results.

Step 1:

Step 2:

After finding your desired theme click on the install button. After installing the install button will be replaced with Activate. Click on the “Activate” button and the selected theme will be activated.

5. How To Install a WordPress Theme by uploading zip file

Besides theme searching for the default WordPress theme directory, you can buy from any external theme selling website and upload it directly to your website.

Before proceeding further Here is a list of trusted WordPress theme selling sites

Step 1:

In your theme searching window, you will find an “Upload Theme” button at the top left corner, click on it and it will expand, and here it will ask you to upload your theme in a zip file.

Step 2:

From the above window click on choose file, file explorer will be opened, here navigate to the folder where you have saved your theme and select the zip file, and click on the open button.

Step 3:

After selecting the theme zip file click on the “Install Now” button. It will start uploading the content of the theme to your server. After uploading files, the themes files will be extracted and copied to your themes folder. It will show you the message, as displayed below, that your theme has been uploaded successfully. Click on Activate button to Activate the newly uploaded theme.

The newly uploaded theme will be activated, go to the homepage and see how’s new theme is looking. enjoy!


6. How To Install a WordPress Theme using cPanel

there is another to install a new theme, for this, you should have ready your zip file. After you have your theme zip file, start to proceed,

Step 1:

Go to your Cpanel by typing “yourdomainname.com/cpanel”. Now navigate to the File tab and click on “file manager”. The file manager will be opened in a new tab.

Step 2:

In the file manager window navigate to your site’s “public_html” folder and click on the “wp-content” folder.

Step 3:

Now, in the “wp-content” folder navigate to the themes folder, here all your previous themes are stored, click on the upload button and you will be redirected to the uploading window.

Here you can select your themes zip file using the select button or you can directly drag-n-drop your themes zip file.

Step 4:

After uploading 100% complete, you can close this window and return back to your file manager and in the theme folder you will see the newly uploaded zip file, if you did not find the file just reload that page, right-click on that file and choose “Extract” option and choose the same directory for extraction and click on extract button.

The Theme folder will be extracted and delete the zip file to save your valuable space.

Step 5:

Now close the file manager and cPanel and return to your WordPress Admin Dashboard and navigate to the appearance>>themes menu. Here you will see your previous active theme and your new uploaded theme. Click on the activate button.

7. Bonus:

Long story short, you can choose any of the above methods or just drop us a message at [email protected] and our expert WordPress will upload your new theme for Free.

woocommerce logo

How to install WooCommerce plugin in WordPress

In this blog, we will show you the complete process of how to install the WooCommerce plugin, creating a store with the WooCommerce plugin, and configure your settings, so you can begin adding products.

WooCommerce is now the most popular plugin on WordPress for creating a store because of its great flexibility and variety of supported plugins available to customize your store.

Another great reason for choosing the WooCommerce plugin is that it’s easy to install and manage, even a non-technical person can manage a store on its own. It’s very easy to add or edit a product in WooCommerce and manage orders.

here we will show you the step-by-step guide on how to install and configure WooCommerce. So let’s get started.

1. install WooCommerce

For Installing WooCommerce go to your WordPress dashboard and in the plugin, menu Click on Add New. This will take you to the plugin search window. In the search bar enter “WooCommerce” and hit enter. From the search results Choose WooCommerce and click on Install Now button.

2. Setting up WooCommerce

Once the installation is finished the next step is to set up the WooCommerce. The easy startup wizard will help you in installation. In the first step enter the following details of your store

  • Store Address
  • Country
  • city
  • Post code

3. Enter store details

In the next step enter the basic details of your store. Select the store industry, either its fashion, medical or an Electronic, etc.

4. Select product types

In this step select the product types. You can select from these options.

  • Phusical Products
  • Downloads
  • Subscriptions
  • Memberships
  • Bookings
  • Customizeable products

install WooCommerce

The first two are included in the free version of WooCommerce, for the rest you have to buy the Premium version of the WooCommerce plugin

5. Business details

n this second last step you have to enter the information about your store. This information includes the details like how many products your store will have and currently you are selling anywhere?

6. Choosing the theme

In this last step, you have to choose the WordPress theme that should support the WooCommerce plugin. You can search Google for “WooCommerce supported WordPress themes“. You will find many paid and unpaid themes that will support WooCommerce. Here WooCommercegives you the option to continue with your default theme, if your current theme support then you can select ‘Continue with my active theme‘ or you can select Storefront which is a famous WooCommerce theme. As our active theme, Astra supports WooCommerce so I continue with the first option.

This website’s active theme, Astra supports WooCommerce so continue with the first option.

7. WooCommerce recommended plugins

Here WooCommerce will show you the list of some important plugins that will help you in your store marketing. These are the recommended ones, you can select them or skip them for now and install them later.

8. Finish install WooCommerce & Customize your store

After performing all the above steps, now it’s time to add products and set up your store details. First of all, you need to set up the payments and tax information for your store. We recommended adding multiple payments options for ease of your customers.

How to Install WordPress in cPanel

How to Install WordPress in cPanel using Softaculous

How to Install WordPress is a general question every beginner web developer has. WordPress is well known as the most popular website builder on the internet. It powers over 40% of all websites on the internet. The main reason for choosing WordPress is that it’s easy to install which makes it the best option for creating a website or blog.

All the best web hosting companies allow you to install WordPress with just a few clicks. In most circumstances, it’s just a matter of minutes to install WordPress and it takes less than a few minutes to complete.

In this tutorial, we will show you how to install WordPress on all top hosting companies by using 1-click install scripts using Softaclause.

1. Softaculous

Softaculous is the most used auto-installer script provided by cPanel. It allows you to easily install popular web applications like WordPress, Joomla, phpBB, myBB, and many more with just a 1-click. Popular cPanel Managers like WHMCS and WHMSonic use Softaculous in their control panel.

Step 1:

Simply log in to your Hosting website and click on cPanel account manager, scroll to the bottom and look for “SOFTACULOUS APPS INSTALLER” and under scripts find the WordPress installer icon click on it to begin the journey of WordPress.

softaculous script installer

Step 2:

Click on WordPress and it will take you to WordPress installer dashboard as under.

softaculous wordpress installer dashboard

Step 3:

Click on install tab to continue installation of WordPress. You will see a screen like this, fill in the required information about your new blog or website, its super easy.

Step 4:

Enter the username and password and email address for the admin account. We recommend not to use admin as your username or password. Use a strong username and password.

Step 5:

Now select the default theme for WordPress. Don’t worry you will be able to install a new custom theme later on. see our guide on

How to install a WordPress Theme

Now Click on Install button. It will take few seconds and your new WordPress site will be live.

Step 6:

Now to login to your WordPress Admin Panel again go to your cPanel And look for WordPress Manager by Softaculous. Click on it and it will take you to your WordPress Installation see blow picture for visual guide.

Step 7:

Click on Login Button and you will be redirected to Admin Panel of WordPress as seen in below image.

Alternatively you can go to your blog or website dashboard by typing the following URL.

yourdomainname.com/wp-admin

Our Website is also using WordPress we will type the following.

https://easywpknowledge.com/wp-admin

Type the username and password that you select when installing WordPress.

Step 8:

You will see your dashboard like this.

2. Read More on How To Customize Your WordPress Blog or Website

3. Bonus

If you have encountered any problem in installing WordPress just comment below or contact us to get free support. Our expert developers are always available to help you with your installtion.

How to Use SMTP Server to Send WordPress Emails

The draw backs of WordPress mail() function

WordPress uses mail() function in PHP to send emails. Many hosting providers does not configure have this function properly, or to avoid abuse they have disabled it entirely. In either case, this causes your WordPress emails function to not function as expected .

Third party email service is the alternative solution is to send out your emails from wordpress. You can use services like Mailgun, Google Apps for work, or Sendgrid or sendinblue and many more…

You may have free services for limited number of emails, which is perfect for small blog, website or store. If you want high services you will have to pay for your account, and the cost will depend on how many emails you send. in this tutorial we show you how to fix WordPress not sending email issue completely.

What if told you that there is another option, and likely you are already paying for it? seems good!

2. Using Email Accounts given by Your Hosting provider

Most WordPress hosting providers offer email services free for each domain you host on their hosting servers. This means you can create email accounts with your own domains name like [email protected]

First of all you will need to create an email account. You can do this easily in your cPanel by following steps. Your hosting service provider visual may differ from following account management system, but the basic is the same on most hosting services.

Log into your site hosting cPanel account, and click on Email Accounts under the mail section.

cPanel Dashboard

This will show you a form where you need to fill out required information to create your email account(s)/.

Since this will be your official email for WordPress site, we advise that you create an email account like [email protected].

Make sure to replace yourblogaddress with your own domain name.

cPanel email account creation

After successfully creating your email account, you are now ready to use it in WordPress. But before continuing you do that, you will need the blow information from your hosting service provider.

  1. SMTP Hosting address
  2.  
  3. SMTP Port number for secure login.

You can check the support section on your host’s website, cPanel managing, for this information. If you are unable just comment blow so we help you find it or you should contact the hosting support to request this information.

cPanel SMTP Info

Install the Easy WP SMTP Plugin to your WordPress

You will now need to install and activate the Easy WP SMTP plugin. For more details, see our following step by step guide on how to install WordPress plugin.

Easy WP SMTP Plugin install
Upon activation, you need to visit Settings » Easy WP SMTP to configure the plugin settings.
Easy WP SMTP Plugin settings

Here you should provide the information that you get from your cPanel email account manager as provided above in picture.

Testing Your Easy WP SMTP

Now that you have set up Easy WP SMTP to send emails, let’s test if our plugin  and check if its working fine. On the plugin’s settings page, click on the ‘Test Email ’ tab. As seen blow

Easy WP SMTP Plugin test email
You need to provide your active email address where you would like to receive test email. This could be any Gmail oy Yahoo or any other valid email address that you can access right now. After that click on the “Send Test Email” button to continue process. Easy WP SMTP will now send an email message using the new SMTP settings you entered. You will see a success message when email is sent successfully.
You did it!
wordpress email issue

Fix the WordPress Not Sending Emails Issue using Plugin

Fix the WordPress email problem right now because it is very common among blogs and store built on WordPress. WordPress email by default use mail() function to send emails.

Many managed WordPress hosting providers don’t provide email hosting service. However, that doesn’t mean you can’t send emails from your WordPress blog/store. Email sending means your WordPress site will be able to send notifications, WooCommerce order confirmations, and other types of site-related, login/signup, emails.


Typical Problem occurs

Typically when you are trying to fix the WordPress not sending emails issue most probably email is set up incorrectly on the WordPress installation, it is not a problem on the server or there can be an incompatibility.

In this blog, we’ll show you how to identify the problem why WordPress isn’t sending emails to you or other users, and show you how to fix it this problem. Whether you’re running a regular WordPress site or a WooCommerce store, we’ll show you how to send emails and keep site running again.

1. Emails Are Sending but Going to Spam

Before Fix the WordPress email issue or running any tests, make sure emails from WordPress are not going to spam folder.

If a users report to you that they are not receiving WordPress emails, it might be simply that their emails are going to spam folder.

Ask users to check their spam folder for emails from the website. Some email clients might identify WordPress emails as spam because they’re automated response.

2. Your Server Isn’t Configured Correctly

A common reason for Site not sending emails is that your server is not configured to send emails.

Web servers aren’t designed for sending emails and it might be that your server isn’t configured to use the PHP mail() function.

But you can easily check if this is what’s causing the problem – and you can fix it

3. Fix the WordPress email before that Test Whether the Server Is Sending Emails

The first thing you can do is to run a test on your WordPress site with the free Check Email plugin By WPChill.

In need of a tool that allows you to easily log and view all emails sent from WordPress? Check & Log might be just the solution for that. This WordPress plugin helps you store sent emails for auditing purposes, as well as debug email related problems in your WordPress site. Works best on eCommerce websites that have been created with WooCommerce or Easy Digital Downloads.

Check & Log Email Setup

This is a plugin designed to test if your WordPress installation and/or server is configured to send emails.

Once installed, go to Check & Log emails > Check Email in your WordPress dashboard sidebar. Enter your email address to send a test email, and click on Send test email.

You will see a confirmation message as under.

check email

Check your email inbox and other folders to see if you received the test email that plugin send as test. The subject line will appear as “Test email from https://yourblogaddress.com.”

Check test email

4. Fix the WordPress email by using SMTP

If you are unable to fix the issue then you can use SMTP option, which is very common to fix the WordPress emails problem.

How to Add a Retweet Button on Your Blog Post

Twitter has seen exponential growth in the past few years which is the main reason why more and more writers are now sharing their stories on twitter handle. If you have seen one of the coolest Retweet buttons on some of most famous blogs, they can be on your blog also.

In this article, we will show you how to add a Retweet Button in all of your posts/pages, so your audience can Tweet your stories with just one click.

There are two main ways to add retweet button in your site. First is through the WordPress Plugin called Tweetmeme

Upload the plugin into example.com/wp-content/plugins/

Visit plugin page from dashboard and find “tweetmeme”

Activate it, and then visit the plugins settings page.

You can change the RT @tweetmeme which is default to RT @yourusername. In our case it would be RT @yourtwittername.

This plugin also allows you to choose the location of the button placement. bottom left Corner, Top right Corner, and so on.

The second way is to do it manually by placing the following codes in your templates file at the location where you want.

For the Large Button:

<script type="text/javascript">
tweetmeme_source = 'Easywpknowledge';
</script>
<script type="text/javascript" src="http://tweetmeme.com/i/scripts/button.js"> </script>

For the Compact Button:

<script type='text/javascript'>
tweetmeme_style = "compact";
tweetmeme_source = 'Easywpknowledge';
</script>

Now you have a Retweet button on your blog. You are now able to get more exposure. Follow Easywpknowledge on Twitter.

Popular WordPress Themes – Multipurpose

WordPress is currently the best CMS in the world, due to its vast customization properties. You can almost create any type of website in it, it’s super easy. Even a non-programer can use WordPress to write a blog. After installing WordPress the first step is to choose a theme from thousands freely available. Here in this tutorial, we have picked some of the Popular WordPress Themes, to start off your blogging. These are the multipurpose customizable theme that can be used to create any type of website, blog, or store.

Here is the List:

1. Divi

Divi Theme

Divi is a WordPress theme and a popular drag and drops landing page builder from Elegant Themes. It can be used to build any type of website that you want by making your changes in the intuitive front-end editor.

Users can pick from 100s of ready-to-use layouts and customize your site using the handy drag and drop builder. Alternatively, you can also start from scratch and build a completely custom-based theme.

Divi themes are mobile-responsive and have all the features you need like gallery, shopping(Woo Commerce), landing pages, social media buttons, and much more.

2. Astra

astra homepage

Astra is one of the most popular and fastest-loading WordPress themes. It is used to build all kinds of websites/blogs. Whether it’s a blog, a website, a portfolio, or an online store, you can make your site look great using Astra’s great features.

Astra gives you all of these multiple layouts, color options, typography choices, stylish headers, and many more. You can import pre-made demo sites and get a happy start on building your website.

Plus of Astra is that it is designed for good SEO (search engine optimization). This helps your blog or store to rank well in Google and other search engines.

Easywpknowledge also uses the Astra theme for this site. It has a premium plugin that extends the Astra theme with extra customization options and features.

3. OceanWP

 oceanwp-homepage

OceanWP is a free WordPress multipurpose theme with many powerful features to customize your website. It comes with its own companion plugin and it also recommends installing a free page builder plugin after activation.

It’s super-easy to use, and you will find all theme options easy to understand. It includes many demo sites that you can import and get an easy start with multiple layout choices, two navigation menus on the top, and also includes custom logo support.

OceanWP also has fully WooCommerce store compatibility to create an online store. It’s also SEO friendly, to help your sites to show on top in search engines.